As UniPrint users know, printing through UniPrint without a valid license will have a UniPrint banner printed diagonally across all printed pages. (Read more about UniPrint license and banner here.)
UniPrint version 7 came out with a different architecture in terms of its licensing scheme. In previous versions, the license is installed on the UniPrint Server (now called the Application Server), and was tied to that server by the server’s hostname and ip address.
Let’s say you have two UniPrint Servers, each having a valid license. In version 6, this means that you will have two license files: one file ties to server A with server A’s machine name and ip address, the other file ties to server B with server B’s machine name and ip address. You can only use the first file on server A only, not on server B, and likewise with the second file.
With version 7, licensing has been moved from individual Application Server (or UniPrint Server in old terminology) to a centralized License Server. This License Server resides with the Spool Server, so in order for you to install the License Server, you’ll have to also install the Spool Server. Fortunately, both come in the same installation (.msi) package.
With this new licensing scheme, licenses for all previous will not work with version 7. That means existing users will have to upgrade their older licenses to get a new corresponding version 7 license. Users are strongly cautioned to test out version 7 prior to deploying UniPrint into production.
In the scenario above, if you decide to have the two version 6 licenses installed on the same License Server in version 7, you will have to upgrade your licenses. Upgrade can be done through UniPrint's website. After the upgrade, you should receive in email a new version 7 license in one single file that contains information of your two previous version 6 licenses.
Click here to see a complete list of articles
To contact us: uniprint.user@gmail.com.


 UniPrint Spool Server Management Console
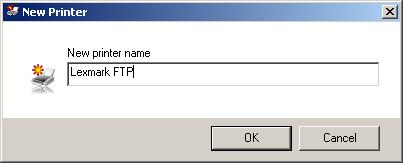 Give a name to the new FTP printer
 Create an FTP Printer in UniPrint Spool Server
 FTP printer created
