When you have an FTP printer (read “What are FTP Printers?”), you first need to test it to make sure that all hardware and network connections work. (Read “How to Test FTP Printers?”) UniPrint literature states that when you have an FTP printer, you don’t need to install the UniPrint Print Server component; you just need to install the UniPrint Spool Server component.
After you install UniPrint Spool Server, start the management console. We are using the latest version (version 6.1.5) for our demonstration.
 UniPrint Spool Server Management Console
On the management console, click the New Printer button. It will only create FTP printers. Give it a name, like, “Lexmark FTP” since we are using a Lexmark T630 printer after our little experiment on testing FTP printers.
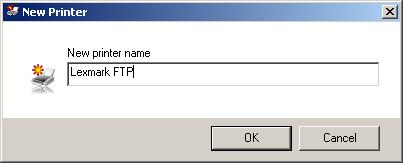 Give a name to the new FTP printer
Then, a window titled “New Printer Properties” pops up. The only important information at this point is in the “FTP Settings” tab. Fill in the IP address of our Lexmark printer (192.168.1.10), and the User ID, which is “anonymous” for our Lexmark printer. And we know that from our little experiment, this account doe not require a password, so we’ll leave the “Password” and “Confirm Password” fields blank. If you printer model requires a password, then fill in these two fields accordingly.
 Create an FTP Printer in UniPrint Spool Server
Click OK, and, voila, you’ll see our newly created FTP printer shows up in the management console.
 FTP printer created
Click here to see a complete list of articles
To contact us: uniprint.user@gmail.com.
No comments:
Post a Comment